My 4 year old daughter has recently discovered the world of fairy gardens.
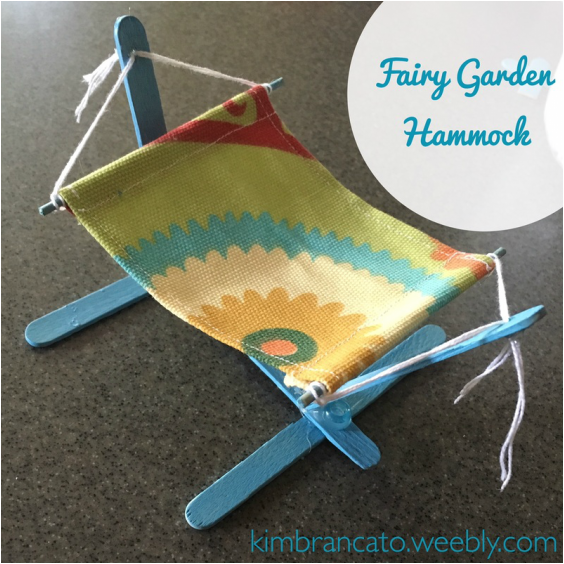
She begged to start one, and I have to admit, I didn't argue. How cute are they with all of the miniature houses and accessories?! And knowing that an actual fairy may come to visit and play right in our own yard? Sold! ;) On a trip to Jo Ann's we passed a display of fairy garden supplies. Oh my goodness, so many options. And oh my goodness, the prices! Yikes. I let her pick out a house and 2 small accessories, used coupons, and then vowed that we would DIY as much as possible for the rest. I'll share what we come up with here on my blog, so that you too can have some thrifty fairy fun! First thing we made was a hammock. With all that flying, those fairies must get tired. They need a place to relax! I was able to construct this using items already around the house, so total cost $0. Materials:
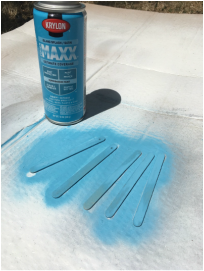
First I used a drill (power tools!! I'm usually not allowed near them because I'm a danger to society with them in my hands) and made a small hole toward the top of 2 wooden craft sticks. Then I used some left over spray paint on the sticks. You want to seal them somehow if your garden is outdoors so the wood doesn't rot. I also painted the wooden skewer but forgot to take a picture! While the paint is drying, assemble the hammock. 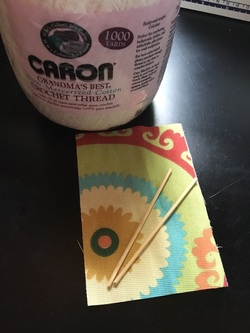
I used a scrap of outdoor fabric I had on hand from when I made new covers for our patio chair cushions. You can use whatever fabric you have on hand, I'm sure even an old t-shirt would work in a pinch. Another option would be to buy a mesh laundry bag from the dollar store and use that for a more beachy/rope hammock feel.
I cut out a 3.5" x 5" rectangle. If you do not want to hem the side edges you can reduce it to 3" x 5". You may need to increase the length if your wooden skewers are thicker. For the string I used some crochet thread I had on hand. Embroidery thread or very thin twine would work just fine. 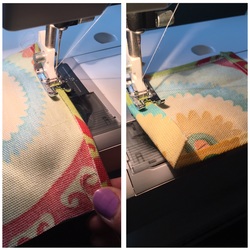
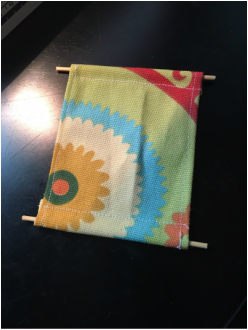
First I hemmed the long edges, just 1/4" on each side, to prevent fraying. Then I made a pocket on each short end, 1/2" on each, large enough for my skewer to slide through. If you don't have a sewing machine you can either hand sew the pocket or use a waterproof fabric glue. Hot glue would probably work, too, just use extra caution especially if using a mesh or thin material.

On to assembling the stand... Take the 2 sticks that you drilled a hole into and cut off the rounded end on the bottom. Using a hot glue gun, form an "H" with the 3 hole-less sticks. Then attach the flat end of the stick as shown with a big glob of glue. I stuck a small bead behind it to brace it and hold it in place. Repeat for the other side.
Now grab your string and cut 4 equal pieces. You may have to play around with the length to get a good fit. I forgot to measure mine, sorry!
Tie each string onto an end of the wooden skewer. I secured each with a dot of hot glue to make sure it didn't slip off. Then feed the strings through the hole on the craft stick. Tie the ends together in the back, and I added more hot glue there, too :) 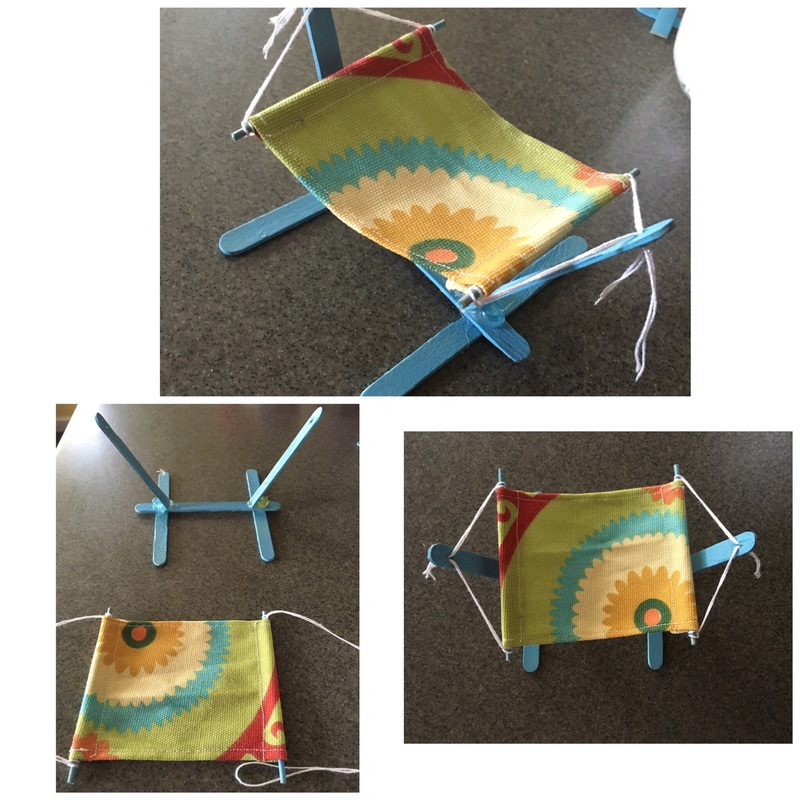
And there you go! A hammock for your fairies to rest in. Now all you need to add is a glass of wine and a good book... Oh wait, that's what I want next to my hammock!
You can also skip making the stand & just tie the strings onto twigs and stick them in the ground, but I knew my daughter would want to rearrange her garden a million times so I wanted something sturdier and more portable. If you decide to give it a try, leave a comment below! I'd love to see!
0 Comments
If you have ever followed the 21 Day Fix meal plan, you will understand.
The BLUE container is sacred. Seriously. It is the container you fill with avocado/guacamole, nuts, cheese, store-bought hummus. AKA all the good stuff! The catch? You only get ONE blue container per day. And it is not huge, not even close. Definitely not large enough to house my hummus obsession. But I know this program works. I have helped countless women change their lives with it. I have had amazing results. It works! Healthy life. Hummus. Tough call! So I did what any sane hummus addict would do... find a way around it! Wouldn't life be great if we could have our hummus and eat a lot of it, too? Here's how you can save your BLUE (ya know, for the other necessity in life- avocado!) and eat more hummus, all while staying true to your 21 Day Fix meal plan... 
I'm vegan, therefore chickpeas and other beans count as a RED for me on the 21 Day Fix meal plan. If you are not a plant-based eater, you will have to use a YELLOW container for this.
Ta-da! By skipping the oil that is used in traditional hummus, you have successfully saved your blue container for avocado, nuts, or cheese. And you can still happily dip your veggies. Or just eat it with a spoon, I won't judge. And here are some fun flavor ideas to jazz it up: 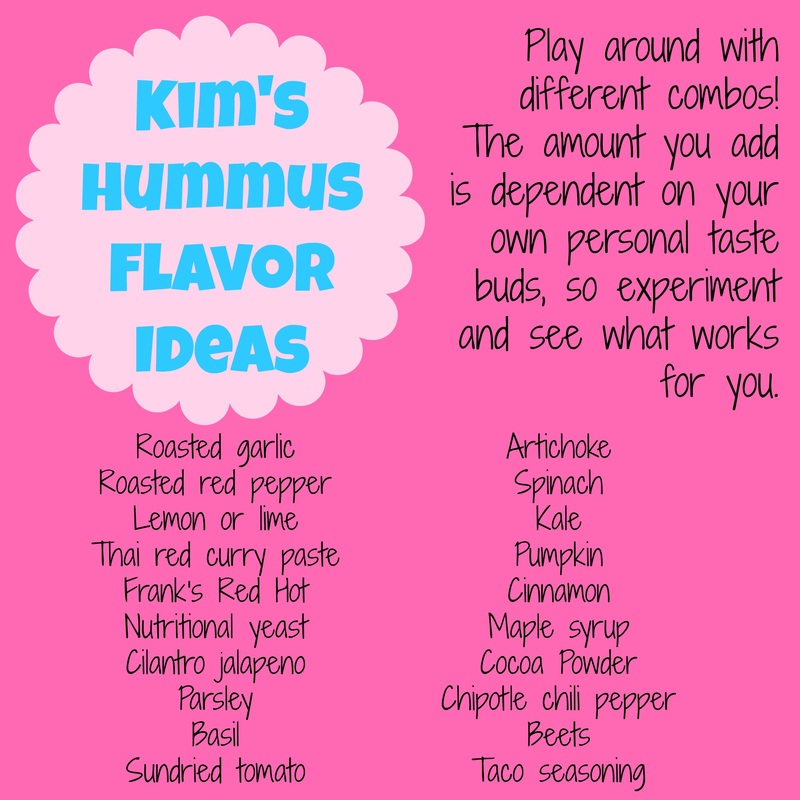
First a huge THANK YOU for all the love, comments, likes, and shares on my family Summer Bucket List! I can't wait to hear all about your own family's summer fun. To follow along with my fam, make sure you pop over to my Facebook account to check out what we're up to!
Now, having fun with my family is great and all. I love it, it brings me SO much joy and fulfillment. But in years past there has always felt like something was missing. I am beyond guilty of losing myself to motherhood. Letting go of myself. Becoming consumed by what my family is interested in. Forgetting who I am. NOT OK. Call me selfish, call me self-centered. I don't really care. One thing I've realized is that I need to take care of myself. I need to remember who I am. Although being a mom is a huge part of who I am today, it is not the only thing that defines me. So last year I decided to make my own personal summer bucket list, filled with activities and goals for myself. Things to help me grow mentally and physically, things that bring me joy, things that make me take a moment to relax, things that just make me feel good. And now I present to you this year's list... |
Archives
September 2016
Categories
All
|

 RSS Feed
